こんにちは、LinuCエバンジェリストこと、鯨井貴博@opensourcetechです。

今回は、以下の記事の続編として光センサーの照度・輝度、およびデジタル温湿度センサーの湿度データを同様にデータ送信します。
なお、光センサーの照度・輝度、およびデジタル温湿度センサーについては、
以下で構築済みのものを使用しています。
光センサーBH1750FVI(GY-30)で明るさを測定する - Opensourcetechブログ
Raspberry Pi(zero)にデジタル温湿度センサー DHT11を接続し、温度&湿度を測定する! - Opensourcetechブログ
光センサーBH1750FVI(GY-30)の照度・輝度
以下のPythonコードをベースに、照度と輝度を送信するためのPythonを作成します。
RaspberryPi/bh1750fvi.py at master · kujiraitakahiro/RaspberryPi · GitHub
照度用Python
(https://github.com/kujiraitakahiro/RaspberryPi/blob/master/bh1750fvi_zabbix_lux.py)
pi@raspberrypi:~ $ cat bh1750fvi_zabbix_lux.py
#!/usr/bin/python3
import smbus
Bus = smbus.SMBus(1)
Addr = 0x23
LxRead = Bus.read_i2c_block_data(Addr,0x11)
print(str(LxRead[1]* 10))
輝度用Python
(https://github.com/kujiraitakahiro/RaspberryPi/blob/master/bh1750fvi_zabbix_brightness.py)
pi@raspberrypi:~ $ cat bh1750fvi_zabbix_brightness.py
#!/usr/bin/python3
import smbus
Bus = smbus.SMBus(1)
Addr = 0x23
LxRead2 = Bus.read_i2c_block_data(Addr,0x10)
print(str*1
DHT11の湿度
こちらも、以下をベースに湿度データのみを取得するShell Scriptを作成します。
RaspberryPi/DHT11.sh at master · kujiraitakahiro/RaspberryPi · GitHub
湿度用Shell Script
(RaspberryPi/humidity.sh at master · kujiraitakahiro/RaspberryPi · GitHub)
#!/bin/bash
cat /sys/bus/iio/devices/iio\:device0/in_humidityrelative_input
sleep 1
cat /sys/bus/iio/devices/iio\:device0/in_humidityrelative_input
sleep 1
cat /sys/bus/iio/devices/iio\:device0/in_humidityrelative_input
sleep 1
value=`cat /sys/bus/iio/devices/iio\:device0/in_humidityrelative_input | sed -r "s/000$/ /g"`
if [ $value -gt 0 ];
then
zabbix_sender -z 192.168.11.6 -s "RaspberryPizeroW" -k humidity -o $value
else
echo "failed"
fi
Zabbix Serverへのデータ送信
crontabを使って、毎分データ送信を行います。
# Edit this file to introduce tasks to be run by cron.
#
# Each task to run has to be defined through a single line
# indicating with different fields when the task will be run
# and what command to run for the task
#
# To define the time you can provide concrete values for
# minute (m), hour (h), day of month (dom), month (mon),
# and day of week (dow) or use '*' in these fields (for 'any').#
# Notice that tasks will be started based on the cron's system
# daemon's notion of time and timezones.
#
# Output of the crontab jobs (including errors) is sent through
# email to the user the crontab file belongs to (unless redirected).
#
# For example, you can run a backup of all your user accounts
# at 5 a.m every week with:
# 0 5 * * 1 tar -zcf /var/backups/home.tgz /home/
#
# For more information see the manual pages of crontab(5) and cron(8)
#
# m h dom mon dow command
MAILTO=""
*/1 * * * * zabbix_sender -z 192.168.11.6 -s "RaspberryPizeroW" -k temperature -o `/home/pi/temp_for_zabbix.sh`
*/1 * * * * /home/pi/humidity.sh
*/1 * * * * zabbix_sender -z 192.168.11.6 -s "RaspberryPizeroW" -k lux -o `/home/pi/bh1750fvi_zabbix_lux.py`
*/1 * * * * zabbix_sender -z 192.168.11.6 -s "RaspberryPizeroW" -k brightness -o `/home/pi/bh1750fvi_zabbix_brightness.py`
Zabbix Server側の準備
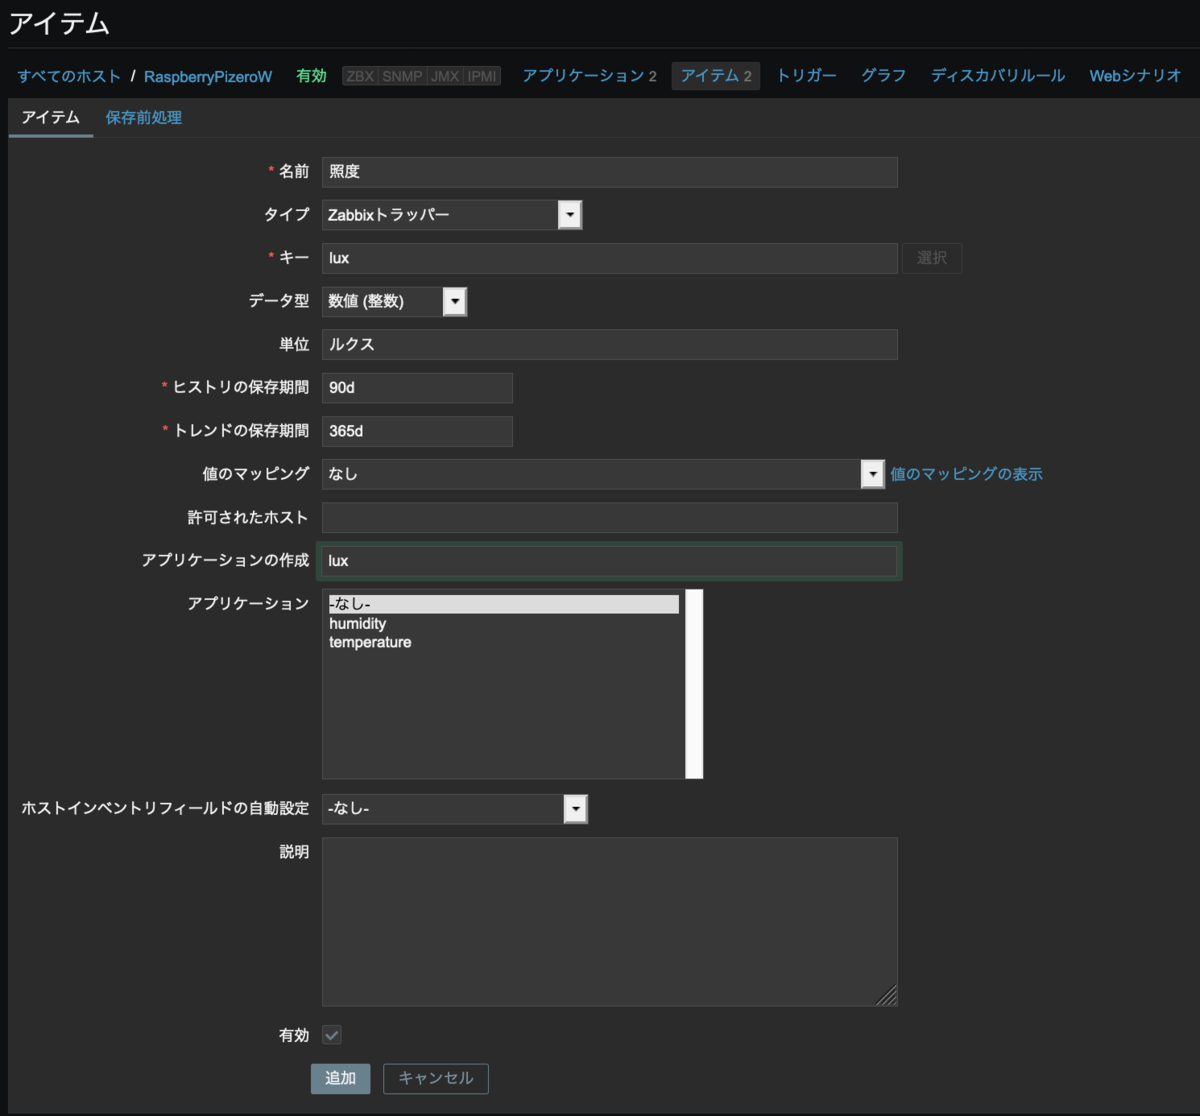
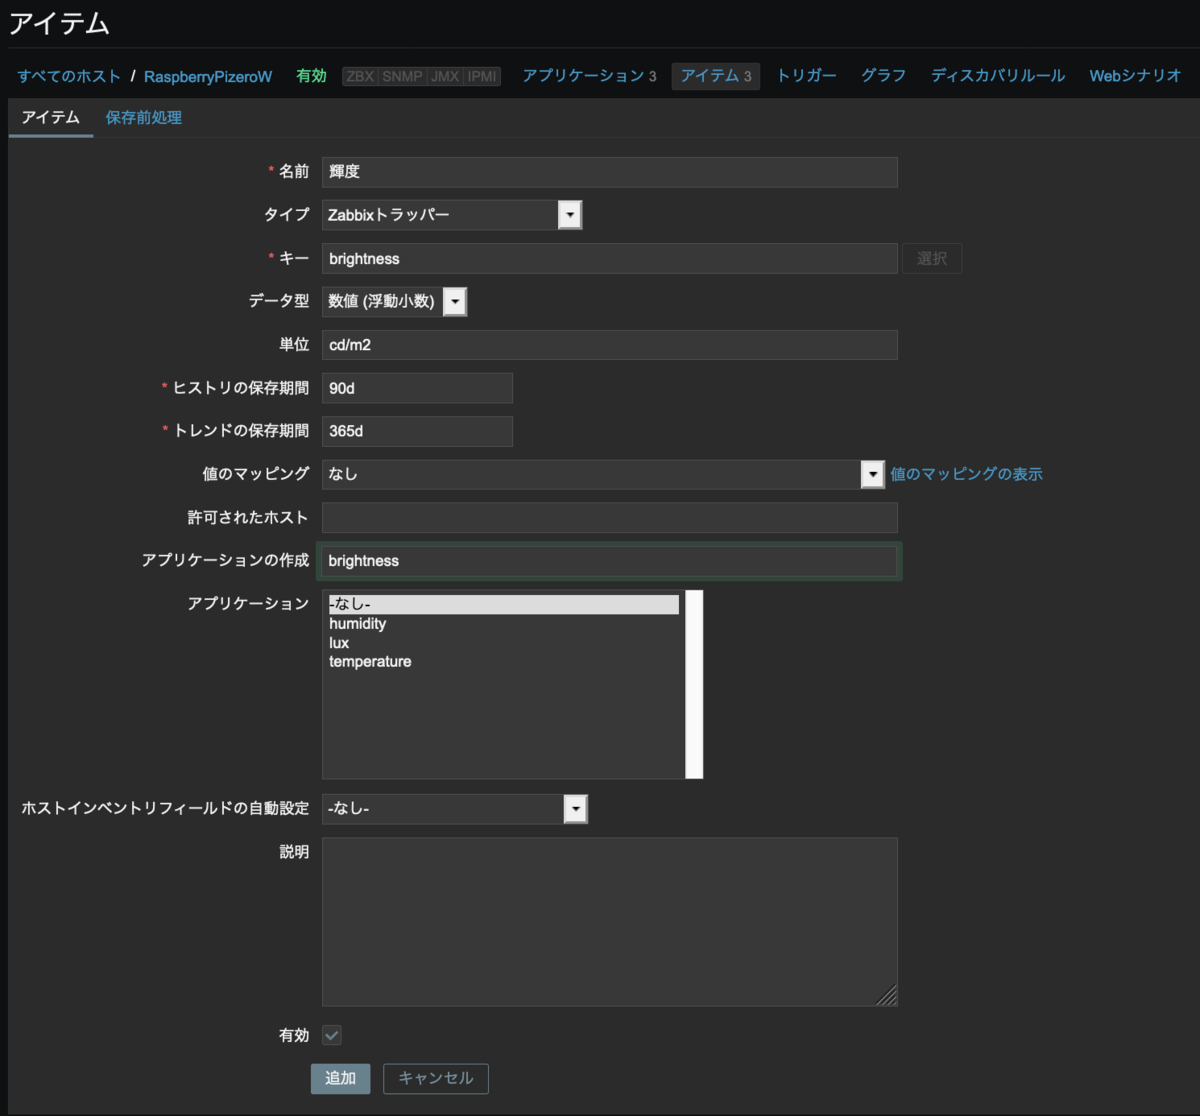
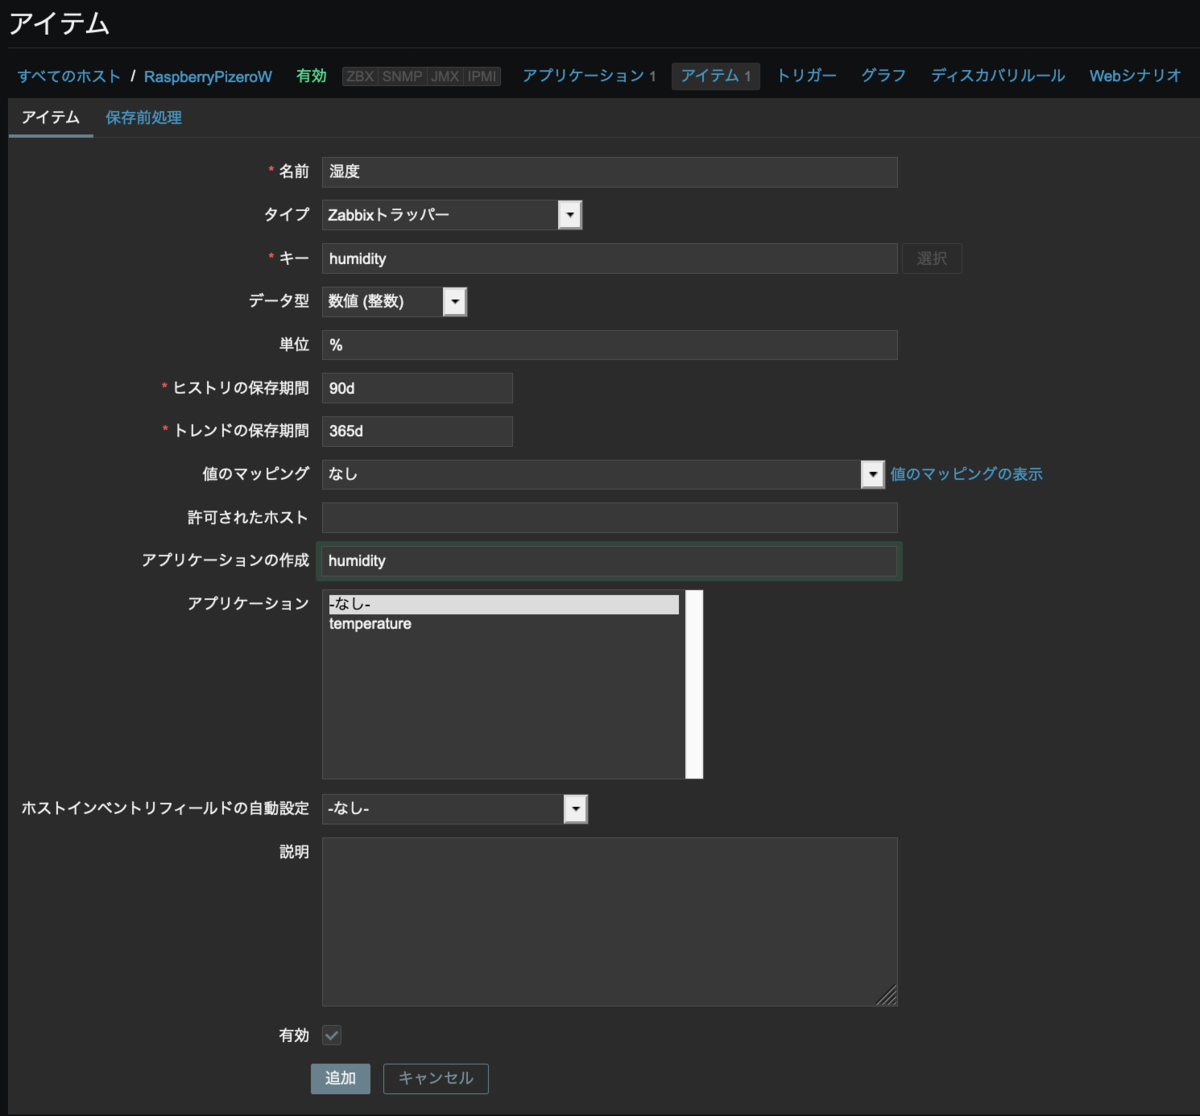
Zabbix Server側では、照度・輝度・湿度の3つのアイテムを追加します。
照度用アイテム
輝度用アイテム
湿度用アイテム
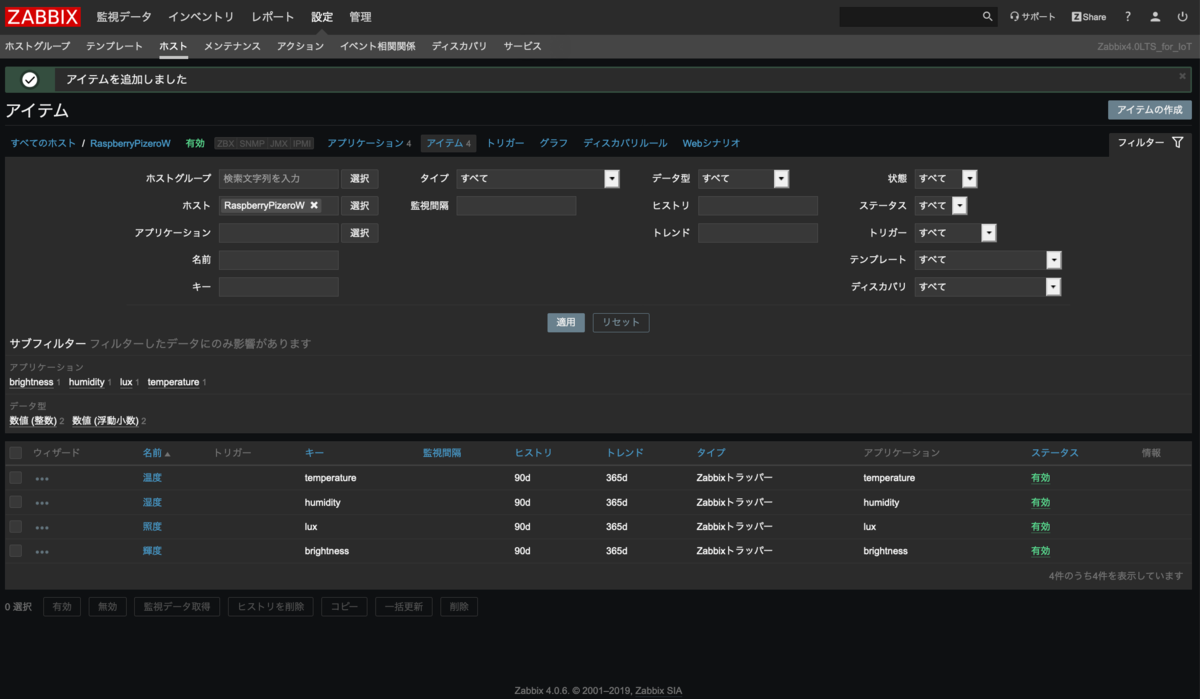
アイテムの追加が完了すると、前回記事で作成した温度と合わせると4つのアイテムが登録されました。
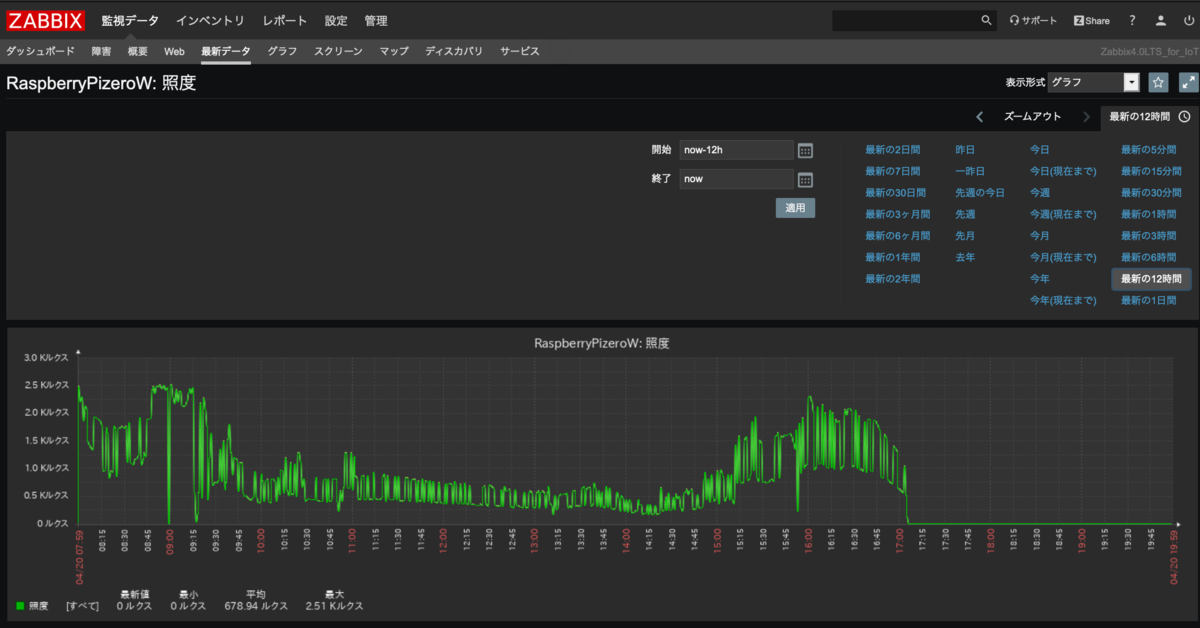
あとは右側にある「グラフ」をクリックすると、以下のように変化を確認できます。
*1:LxRead2[0] * 256 + LxRead2[1]) / 1.2